


Slesse NE Buttress - Simul-Climbing 101

Updated: 24 hours ago

Jump to:
Introduction
I finally locked in a partner for the ultra-classic NE Buttress of Mt Slesse, and weather panned out for us to have a perfect day climbing the route.
For brief backstory, I've been wanting to climb the NE Buttress (hereafter called "The Buttress" or "NEB") for many years. Between other projects being a priority (the Horseshoe) and schedule/ weather/ partners not lining up, it always remained unticked on my to-do list. This year, I was determined to get it done. I had several possible partners in mind, but one can never have too many back-ups, as things tend to come up unexpectedly. I didn't even know Rhys until this spring, when he and his fiancé (Abby) introduced themselves at Reggae Wall, where Jas and I were cragging with Ben and Abbi. Rhys asked,
"Hey are you the guys that did the Horseshoe? That was so sick, I watched your film!"
We chatted a bit as we packed up and they set up, and I got Rhys' number to see if we might get out climbing together in the future. And get out climbing we did! Climbing at Reggae together, Rhys asked if the "The Buttress" was worth climbing, to which I replied that I had not yet done it. Since I had some tentative plans already made with another partner, we decided to climb the North Rib after he got married in September. If my plans fell through with the NEB, that would be another option for us as well.
The Plan
Fast-forward to end of August: crappy weather and schedules did indeed cause my plans to fall through with another partner for the Buttress, so I had one last opportunity in mid-September. Rhys was still keen to get out, and we swapped our plans to climb the Buttress rather than North Rib. As the weekend of Sept 18-20 approached, I saw a bullet-proof weather window and we eagerly awaited the trip as we hashed out the gear requirements.
Our plan was to simul-climb in several blocks in order to move quickly and complete the 800m climbing route (with 2000m total gain) in a day-push. Moving efficiently, we could climb it in 15-18 hours car-to-car.
For those that don't know what simul-climbing is: it is a very efficient climbing tactic to tackle easy terrain.
Once the leader reaches the end of the rope, the follower starts to climb behind. The follower can adjust slack in the system with a Grigri, pausing to belay at a stance if the leader is doing a hard section. The leader can then place a Microtraxion above cruxes to protect the team from a fall - the device allows rope to move up, but not down. So, if the follower falls, the leader is not yanked off the wall. If the leader falls, the belayer/follower catches them like normal (as long as they manage the slack appropriately). In this way, the leader can place gear sparsely on easy terrain and cover multiple lengths of rope (pitches) and a team can group pitches into larger "blocks".
Gear List
To do this, we needed to pack light, bringing enough gear for safety, but not burden ourselves too much and slow down as a result. After going back and forth on some options, we settled on the following list:
50m 9.5mm rope (easier to use with Grigri and Microtraxions)
30m Tag line for extending rappels with a biner-block (would leave this behind next time)
Grigri's (rather than tuber/ATC devices)
Triple Microtraxions (reduce rope drag & protect cruxes while simul-climbing)
Doubles of 0.3-1 size cams, singles in 0.2, 2, and 3.
Doubles of nuts (anchors/pro/bail anchors) as well as a nut tool each
12 alpine draws: 6x single biner over the shoulder, 6 regular to rack on the harness
Slings: 1x240cm, 1x180cm, 1x120cm to build anchors
Harness: opted for regular harnesses for more comfort (rather than UL options)
Personal Tether: 120cm sling girth hitched to harness
Shoes: I wore my comfortably-sized LS Finales, great choice. Rhys wore TC Pros.
Chalk bag: obvs
Radios: Rocky Talkies
InReach: obvs
Water / Food: 3.5L of water, filled up at propellar Cairn. Assortment of bars etc.
Clothing: Pants/sun hoodie all day. Wind-breaker, vest, puffy as back-up layers.
Emergency/First-Aid: I brought 2p SOL bivy, Rhys brought first aid with meds, bandages etc.
The main adjustment for next time would be to leave behind the 30m Tag line and only bring a 50m rope for simul-climbing and rappels. A 60m rope would be fine as well, but just adds extra weight and length to deal with.
The 30m Tag line was a nice idea to extend our rappels by doing a biner-block, but this proved to almost get the rope stuck on our first rappel. Rather than do the first as a 40m rappel, I'd happily do 2x20m raps with no obstructions in the middle of the rope to get caught. The rest of the rappels (one more on Slesse and four more on Crack of Noon) we simul-rapped using Grigris on just the 50m, which was incredibly efficient. I had suggested using my 2x40m 7.7mm half/twin ropes, but they would have been trickier to use with Microtraxions due to their thin diameter, as well as not being able to use a Grigri to belay/rope manage two ropes at once.
Goals of this Report:
My intention is to highlight what I found to be the most helpful information that I found online for those wishing onsight this route in a day-push.
First-off, I found Mountain Project's description to be mostly unhelpful (no offense to the author... that definitely took a lot of effort to write). I would not spend time memorizing the pitch-by-pitch breakdown presented there, as there are not clear demarcations nor belay options for the alleged 25 pitches along the route. If you plan to climb the route in a day, you will only do between ~4-6 Blocks of simul-climbing.
Rather than micro-beta, I would focus on a few landmarks to keep in mind. The best source I found was Kevin McLane's aerial photos from Alpine Select. It's a worthy purchase (despite having some errors / mistakes in it...), and these photos are what helped us the most. I'm hoping to add to this with more "boots on the ground" photos of these landmarks. Steph Abegg also has some really good reports of her two trips up the Buttress, so you should definitely check those out as well.
The Big Butt(ress)
First off, here is a short video I made from the trip. I didn't feel like bringing my GoPro, so I just filmed on my phone.
Overview
View from Rexford View from Crossover Trail View from Parkes Ridgeline Zoom-out of Crossover Descent Slesse Descent view from trail Slesse descent view from Drone
The photos above show an outline of how we broke-down the route into segments. The table below shows time-stamps for our trip. On Sept 18, Dawn was at ~6:20am, Sunrise was ~6:30am, and Dusk was at ~7:45pm. To maximize daylight while on technical terrain, we started at 3:15am, giving us 16.5 hours until dusk. Our goal was to be on the Bypass Ramp before or at Sunrise (we ended up being a bit faster - a good problem to have). If you climb earlier in the year (late July into August), you'll have more flexible start times with longer daylight. However, you will have to deal with more snow on the route, especially on the Pocket Glacier. Snow can be helpful as a water source, but may result in wet rock.
Elapsed Time | Time of Day | Checkpoint / Landmark(and ∆Time) |
0h 0m | 3:15am | Car parked at washout (~400m from trailhead) |
1h 51m | 5:06am | Propeller Cairn (1h 51 mins from car) |
~20 mins | - | T1: eat, fill water, transition to harnesses etc, leave at ~5:26am |
2h 55m | 6:10am | Base of Bypass Ramp via notch and Pocket Glacier (44 mins from prop cairn) |
3h 18m | 6:33am | Scramble up to Gendarme, rope-up from there (23 mins from base of Ramp) |
~15 mins | - | T2: Rope-up at Gendarme for 1st simul-block, leave at ~6:48am |
5h 43m | 8:58am | Two simul-blocks via Beckey Bypass to Bivy Ledge (2h 10 from Gendarme; 2h 48m from base of Ramp) |
~30 mins | - | T3: eat, drink, answer nature's call, leaving ledge at ~9:30am |
10h 53m | 2:08pm | One long simul, two shorter blocks/pitches, one long simul to the SUMMIT OF SLESSE! (4h40m from Bivy Ledge, ~8hrs Bypass Ramp to Summit, 6 total blocks/pitches to 5.9) |
~30 mins | - | T4: eat, drink, enjoy views, leaving summit at ~2:40pm |
12h 25m | 3:40pm | Bivy cave at base of Slesse** with two rappels (~60 mins down from summit) |
13h 44m | 4:59pm | Crack of Noon Anchors via Parkes* (79 mins from Cave; 2h19m from summit) |
14h 31m | 5:46pm | Base of Crack of Noon with four rappels*** (47 mins down to base; 3h6m from summit) |
~10 mins | - | T5: remove gear, repack bags + water refill at creek along way |
16h 24m | 7:39pm | Car-to-car in ~16.5 hours, just before complete dusk. ***5 hours down from summit excluding lunch break*** (expect 6+ hours) |
Without knowing your fitness or experience, here are some realistic time-stamps for those wanting to climb the buttress in a single day:
~3.5-4 hrs to the base Bypass Ramp
8-10 hours from Bypass Ramp to Summit
6-7 hours for the descent from summit to car via Crossover/Crack of Noon
While parties may make good time from car to summit, many hale the descent as the crux of the adventure if taking the Crossover route. Parking a car on the West side (scrambler's trail) simplifies the descent, but makes it tedious to pick up the other car from Nesakwatch Creek or requires arranging a shuttle with a friend.
Having done Slesse 7 times prior, as well as the path to Crossover twice, we were able to expedite the descent to the Crack of Noon Club rappels. Paired with Rhys' recent climb of CoNC, we reduced the rappels from 10 to 4.
Paired with our prior knowledge, an early start (3:15am) gave us enough daylight to descend to the car without headlamps. Adding darkness as another layer of difficulty would make the Crossover descent exponentially more time-consuming (hard to find rap anchors etc). You should NOT expect to descend from the summit to car as fast as we did (5 hours) for your first time in this area. Plan on 6+ hours for the descent.
Trip Report
The Approach
Starting at the car at 3:15am, we moved at a conversational pace up the trail, not rushing, not dallying. I was expecting to reached the Propeller Cairn in about 2.5 hours, but we were even quicker than I expected, arriving in under 2 hours (1h51m). It was pitch black still, so we took some time to fill up our water reservoirs from the glacier run-off and eat some food before donning our harnesses and racking a few pieces of gear just in case we needed any. Crossing the rock slabs in the dark was a neat, and I was thankful to have my 1500 lumen headlamp to find the "notch" to pass over the East Pillar. This was a bit slippery and vegetated, and we passed some rap tat as we carefully scrambled down to the Pocket Glacier. There was very little snow remaining in the cirque, with only intermittent streams of water to step over on the way up the polished slabs of rock. We reached the base of the Bypass Ramp at 6:10am, 2h and 55m from the car, just as the sky began to hint of dawn.
Bypass Ramp to Gendarme

I have several friends on Chilliwack SAR, and I'd heard of a climber falling off the bypass ramp a few years ago, reportedly spooked by rockfall. Unfortunately, they did not survive the fall and were airlifted out by SAR after their climbing partner called it in. I wasn't totally sure what to expect, as some reports (i.e., MP) call it "2 pitches". It would be a tricky section to find solid protection for since it has lots of vegetation, and once again, if you are aiming to do it in a day - you can't waist time by pitching-out the bypass ramp.
Turns out, it was straighforward class 3-4, with solid exposure and much veggie-belaying. Pretty neat that the ramp leads all the way to the buttress proper, it certainly expediates the climb rather than climbing 6 extra pitches of the "Direct" variation. Well protected by trees, we did a couple steep sections unroped in our approach shoes, intent on reaching the Gendarme before tieing in. I'd read about this "rock finger" as prominent feature, and it marks a very reasonable transition point to put on rock shoes and rope up.
Gendarme to Bivy Ledge
I've read of some other groups continuing up without ropes to just below the steep 5.10a section, but unless you plan to solo much more of the route, it wouldn't make sense to continue as there are a couple steep and hard moves above. Besides, simul-climbing is infinitely safer than free-soloing and about 80% as fast if you move well. The sun started to peak over Rexford as we tied in, and I began the first simul "block" of the day. I started going a little too straight-up, but reversed to find easier terrain off to the left before trending right up higher a slabby section. There were some obvious "steps" made in dirt where climbers tend to go, so route-finding wasn't too hard for the most part. A few steep moves warranted some attention but I soon made the transition through a patch of trees to the right side of the buttress, where we would remain for most of the climb. Above the trees was quite easy, and as the crest steepened I started looking for a belay location as I was running low on gear. Soon after, Rhys joined me below the steep 5.10a section. We weren't planning on climbing the 10a variation, opting for the "Beckey Bypass" on the N face of the buttress that goes at 5.8, to save time and effort. I think this first Block was around ~150m and overall quite easy, with my particular route-finding capping out at around 5.7-5.8 for a few moves here and there. There might be an easier way, but I found a fun steep spot with good protection and took that option, which was around 5.8 for a couple moves.
Rhys grabbed what remaining gear I had on my harness and he set off for a short ledge traverse before climbing up mossy and shaded rock. I followed, feeding rope out and pulling it back as I slowly clambered behind Rhys. After going straight up for ~80m, there is a distinct point to turn left up a gully-like ramp to regain the prow, indicated by looking right at the North Rib. When you see a notable gash in the North Rib, you know you are going up the correct ramp system. At the top is a really fun hand-crack that leads to Bivy Ledge. The hand-crack was maybe about 5.8, but otherwise everything was around 5.6 or easier with lots of dirt and moss steps, which made for great simul-climbing up another ~150m block.
We absolutely cruised this section, arriving at Bivy Ledge before 9 am. That put us about halfway up the Buttress in under 3 hours... would we reach the summit before noon? If you read the time-table, you'll already know that this was not the case, but it was a fun thought in the moment. We rested, eating some banana bread that Rhys made and drank some water to rehydrate. I should have added some electrolytes, as later on I got a quad cramp while doing stemming up a corner! Just before departing Bivy Ledge, I also, ahem, had to answer nature's call... thankfully I brought a WAG bag with me! The Buttress doesn't have enough real-estate for climber's feces to decompose on the wall, so this is something to keep in mind. I'd also prefer to not have a "brown falcon" fly past me while I'm climbing... so pack a WAG bag, folks.
Rhys on Bypass Ramp Just below Gendarme Gendarme at dawn Rhys, Rexford behind Stunner sunrise! Can you spot Greg? Pocket glacier far below Shroom Rhys leading away on Block 2 Notable continuity of "Ramp" on North Rib Hand-crack below Bivy Ledge Rhys at belay on Bivy ledge Peering off the edge... So stoked! Banana Bread

Bivy Ledge to Summit
Since we made such quick time to Bivy Ledge, it felt like our adventure was almost over. Goodness gracious was I wrong. After about 30 minutes of enjoying the position and refuelling, I start uped up on Block 3, reported to be 3rd class to low-5th class in McLane's guide. He was not wrong. It turned out to be super cruisy, and was my absolute highlight of the entire climb.
Bobbing back and forth, on and off the ridge crest, we peered over the precipice down to the pocket glacier below.
The exposure was exhilarating, and mixed with the easy climbing it made for a superb block of alpine rambling. After a good ~150m+, the prow started to steepen again while my rack began to diminish. I found a good belay ledge and Rhys soon joined me.
Rhys set off off, quickly discovering a piton. We conferred with one another whether this was "on-route" or if it would mislead us. Perhaps off to the left would have been better climbing, but Rhys' option worked just fine in the end despite being a bit dirty. However, a small oversight was that both of us forgot to pass along two of the Microtraxions (used for protecting cruxes while simul-ing), so Rhys was limited in how far he could go past the 5.9 crux. He ended up shortening his block to be perhaps 80-100m, stopping just above the crux section. As I followed, I marvelled at Fred Beckey climbing this route in 1963 with what gear they had at the time - simply incredible! Pulling my way up the steep "5.9 jugs" (i.e., giant flakes of rock with generous hand-holds), I passed a very old, rusty bolt. Rhys wisely avoided clipping the artifact of history, opting to place some more dependable gear above. Another piton protects the steep "roof" section, notable for it's red-tinted rock and parallel finger-cracks. I pulled through the steep bit to be greeted by a smiling Rhys at the belay.
It was my turn to lead, and I looked up at the imposing, lichen-covered rock above. Whenever I climb with stronger partners, my brain tends to take on a "beta" mode, knowing that I can lean on the "alpha" climber if I need to. This mentality reverses when I am the stronger climber in a group, and I find that my brain is always sharp. Today, as the beta, I had the option to choose whether to be "on" mentally or to coast and let Rhys lead.
Aside from the physical challenge of climbing, I find immense gratification from mastery of the mind: calming the nerves, relaxing, and committing to a move. Whenever I face a moment of doubt, I relish the opportunity to overcome my inhibition. Sometimes that moment comes at the base of a pitch before even starting. There on the Buttress, I wanted to look back on the experience and feel the satisfaction of mastering my mind. Even though I was tired and could easily pass off my pitch to Rhys, I knew I would be proud of myself later for pushing through and not backing down.
I racked the gear on my harness, surveying some options to continue up. A few metres above Rhys, I was heading towards a broken section of red-rock amidst a sea of black lichen. I found an old piton, and figured I must be on a viable route. In hindsight (looking down from above at the belay), it would have been better to trend further to the right after exiting the 5.9 crux. There was cleaner rock to further right of the crest, indicating that it was more traveled.
Alas, I did not have the benefit of hindsight, and so I clipped the piton and pressed on. What followed was what Rhys described as a "character building pitch": 50m of tricky, sustained climbing on dubious, lichen-covered rock. My calves have never been so fatigued, as I tip-toed up steep slab moves and tapped tenuously perched flakes to find solid hand-holds. Pulling around a loose block, I finally found a decent anchor location by a Lost-Arrow piton. I was quite gassed, so I made a belay using the piton and some cams.
A good lesson is that not all pitons indicate being on-route... several that we found were seemingly "off-route".

Rhys soon joined me at the belay, and we both noted the cleaner rock further on climber's right of the ridge crest. Oh well, good to know for next time! Swapping gear over, Rhys set off on what we hoped would be the final pitch of the day. Just above this point is where climber's can escape to the left of the prow into easier terrain, rather than climbing the steep final section of the buttress. Rhys led our last simul-block up the path of least resistance out to the left, and I soon followed once I ran out of rope to feed him. This block turned out to have several fun and engaging sections despite being relatively easy. Rhys radio'd down and built a final belay 20m below the summit. I topped out the last ~120-150m block to a grinning Rhys. The excitement was palpable as we untied, coiled the rope, and scrambled the last 20m up to the summit together.
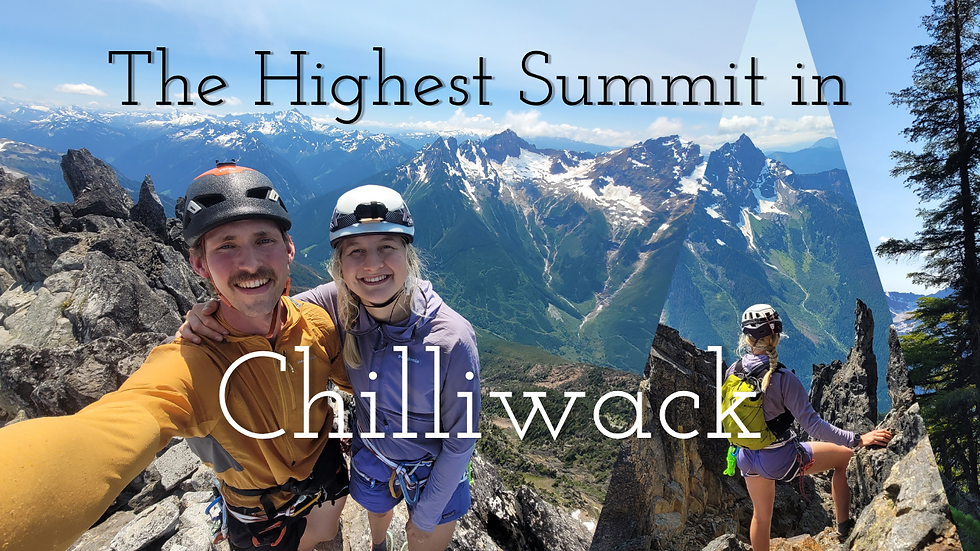
Finally, after nearly 11 hours, we were standing on the summit of Slesse: my eighth and Rhys' first time.
We sat down on the summit ridge, eating more food and quenching our thirst. The temperature was perfect, with a light breeze blowing in the cloudless sky as we soaked in the panorama.
Long way to go Rhys following Block 3 Leave no trace eh? I packed it out High up on Block 3 Rhys on Block 4 below crux 5.9 Piton 1 Bolt at 5.9 jugs... didn't clip it Exposure on 5.9 crux Crux piton Myself exiting crux Belay piton for Pitch/block 5 cool moss Rhys following Pitch 5 Rhys leading block 6 Parkes/Crossover far away Rexford Summit in sight Another (rusty) piton Summit timer Yahoo! Slesse summit #8!
Descent to Car
After about 30 minutes enjoying the views, we loaded up and began the winding descent off Slesse. Having done it 7 time prior, I led the way across the ledge systems until we reached the rappel anchor, bumping into a father and son-in-law duo who were climbing Slesse for the first time together.
Upper ledges and 1st rap Complete descent Slesse descent view from trail Trail splits to Notch Notch to Parkes Zoom out view of trail
Rigging up our rappel, we tied the 50m rope to the 30m Tag line and set up a "biner block" so that we could lower off of one strand without the Tag line slipping past the anchor. This allowed us to make a 40m rappel with our cumulative 80m of rope.
This is the one thing that I would change, as the knot/biner got caught on the lip of the cliff that we lowered over, requiring us to pull with assistance of the microtraxion clipped to the waist.
Thankfully, the rope came down and we didn't have to scramble back up to retrieve it. But, this is always such a stressful and frustrating situation, and I would much prefer to leave behind the 30m rope and simply do two 20m rappels using the halfway anchor.
We scrambled down the first gully, climbing through the exit ramp (4-5th class move to gain ramp), and down-scrambling past the optional anchor/rap station. We decided to make a rappel down the 4th class black-lichen rock as I don't love down-scrambling this with a large pack on. To save time, we trialled a "simul-rappel" down this section, and after faffing a bit with slings and tethers, we were able to make extend the 25m rap into 30m to reach a ledge and avoid resetting at the middle anchor. This section could easily be done as 2x20m rappels but we were feeling obstinate and down-scrambled the last 10m.
Finally, we scrambled up to and down from the iconic "Diving Board". This has a rappel anchor on it, but I would recommend scrambling down the large gully and through the large chock-stone. It is a bit loose but and saves about 100m of rappels. Just be cautious about setting off rocks down the gully onto other climbers! (Ihor and I were almost struck while ascending the gully in 2024 by idiotic NE Buttress climbers who trundled a boulder and didn't yell "ROCK!").
We made it to Bivy Cave, which is where I normally transition out of harnesses. However, we were descending via Crossover, so we just kept our harnesses on. In my two previous trips from Slesse to Parkes (Slesse-to-Pierce and the Horseshoe) I'd missed the correct gully, going too high and rappelling, and then descending too far down the trail and losing 200m of elevation unnecessarily. I assume that snow would make this broad gully a bit more interesting in early season, but for us it was dry and loose dirt-surfing down to regain the ridge proper.
Crossover Descent viewed from Buttress Mountain Project - CoNC anchor
Slogging along the undulating ridge, we finally reached Parkes. There are a few options to descend Parkes, including the Eastern "grassy ledges" traverse, rappelling, or going down the West side. The grassy ledges are very exposed, rappelling adds time and faffery, and I'd gone down the West side both of my previous trips and found it pleasant. So, we dropped off the West and skirted below Parkes towards the East to the saddle between Parkes and Crossover, and to the anchor for Crack of Noon. I've shared a helpful picture from Mountain Project of where the anchor is located on a large boulder at the base of a steep, sandy slope. We employed our new tactic of simul-rappelling down from the first anchor. It is noted as a 28m rap, but our 50m rope did just fine in making a 25 m rappel. We did another 25m simul-rap right after, and were able to scramble down much of the rest, making two more rappels to the bottom. We should have made a 5th rappel in the middle portion amidst a slabby section but found ourselves lanyard-clipping a bolt on a slab to swing across a blank section. We both agreed that was unnecessary afterwards and that we should have pulled the rope out.
Depending on your scrambling comfort and ability, you might find yourself making more rappels than we did, and I would trust your gut. Saving an extra 5-10 minutes here and there is not worth having an accident due to getting yourself into a situation you can't get out of.
At the bottom of CoNC, we weaved through the boulder field to the trail, where we finally transitioned out of our climbing gear. Parched, we located a trickle of water and waited patiently as we filled and refilled a bottle. Ironically, we were only a few minutes away from a fast-flowing creek just before rejoining the Memorial Trail. We passed some climbers that we'd spotted on North Rib, and it sounded like they had an absolute epic on that route (in the not-so-positive interpretation of the word...). Finally, we made it past the painfully long switchbacks, across the bridge, and back to the car juuuust before headlamps were necessary, 16.5 hours after leaving the car.
Down we go First rappel Diving board On the ridge to Parkes View from CoNC anchor Scrambling down part of CoNC All done with the rope!
This was undeniably one of the most remarkable alpine climbing days I've ever had. Thanks to our familiarity with the area, research, and experience, everything went very smoothly and we didn't feel unsafe or that we pushed past our comfort zones the entire day.
While I'd wished to climb this iconic route sooner, I am glad that I tackled it after having built a good resume of alpine experience over several seasons. Instead of feeling like an enormous jump in difficulty, The Buttress felt well within my abilities. While I had a flicker of uncertainty on pitch 5 from fatigue, I was able to subdue my doubt and execute. Overall, I felt quite calm and composed on the route, which allowed me to enjoy it rather than feel stressed and in-over-my-head. I'm stoked that I got to share this day with Rhys and I'm excited to learn more from him, try some harder objectives together, and keep improving as a climber.


Comments